

Setting up boots and shoes with heels require a little more work than regular clothing to set up properly in SineSpace. Fortunately, it’s easy to do and with this tutorial you should be able to get great results in no time.
First things first, you should already be familiar with the basics of creating and uploading clothing for SineSpace. If you’re not, check out my clothing tutorial. You can also get more info on the SineSpace wiki or the SineSpace channel on Youtube.
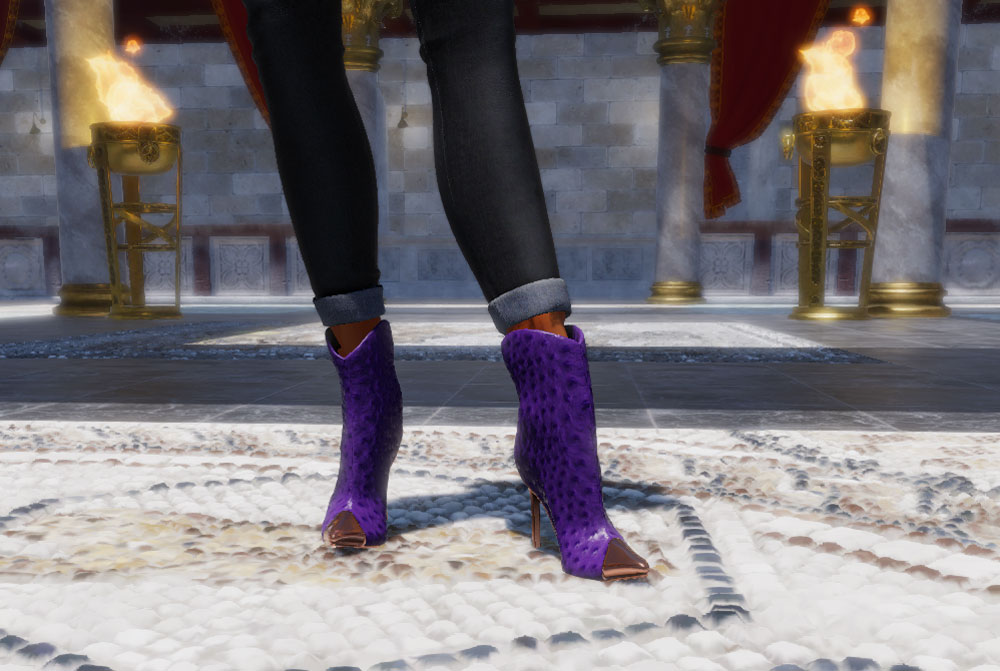
Once you are familiar with the basics, try your hand at a pair of high heels or boots with heels. After loading the Space avatar into the scene (search for 2017 female in the project panel and drag it up into the scene hierarchy), add your boots. You should see something that looks like this:

It’s okay, this is perfectly normal!
Notice in the picture that the boots are lined up so the heel of the foot is aligned with where the heel would go in the boot? That is important – your boots should be at an x/y/z position of 0, 0, 0 and be similarly aligned.
Morph Targets
If you are making boots or shoes that have an exposed foot or open toe design, then you need to adjust a couple settings in order to make the SineSpace avatar’s feet fit. If your boots/shoes are an enclosed design, you can skip ahead to the Clothing Item Settings section below.

The first thing you’re going to want to do is inspect the avatar in your Hierarchy panel. Open up the 2017 Female (or 2017 Male) object, and then open the Geo_grp sections by clicking on the triangle to the left. Now select the femalebody (or malebody) object.
Next, in your Inspector panel, click on the triangle to the left of Skinned Mesh Renderer and then click on the triangle next to BlendShapes to expose an avalanche of settings. These let you control various aspects of avatar positioning and shaping, and you are going to scroll to nearly the bottom of that long list to find three specific sets of controls, two of which are important for setting up your footwear:

Slider.high_heel accepts a value of 0 – 100 and affects the shape of the foot in the heel. A value of zero means no lift, and a value of 100 is an extremely high heel. Play with a setting here to find a number that works best with the shape of your boots or heels.

Slider.archoffeet also accepts a velue of 0-100 and affects the offset (or crunch) of the arch. A value of zero means no effect, and a value of 100 is severely crunched.

Make a note of the numbers that work best, and then you can change both values back to zero so that your Space avatar base is at its default values. Next, move on to the Clothing Item Settings below.
Clothing Item Settings
Now go to your boots/shoes object, and look in the Clothing Items Settings component. Click open the triangle for Extra Settings, and then click on the triangle to the word Heel to expose the Extended Heel Settings.

Make sure to tick the box that says Use Heel Settings.
If you have Morph Target settings from the section above, enter your Slider.high_heel settings under Heel Amount, and Slider.archoffeet under Arch Offset.
For Avatar Center of Mass, enter a number to represent how high the avatar should be raised above the ground. A value of zero is no lift at all, and may result in the bottom of the shoes or boots going beneath the floor or ground terrain. A value of .01 equals 1 centimeter, and a value of 1 equals 1 meter.
Now that you’ve finished setting up boots and heels settings for SineSpace, you can fill out the rest of the info in your Clothing Items Settings and Virtual Goods scripts as you normally would. Everything should look great in-world. If it’s a little off, go back to the editor and make an adjustment. You’ll get it right in no time!

Does this tutorial remind you of the boots & heels page on the SineSpace wiki? It should – I wrote it! In the early days of the beta, I learned from and contributed to a number of wiki pages. As their doc team works on refreshing their site, I felt like I should be posting my stuff here instead. I’m excited to see what they come up with, and didn’t want to be sad or hurt if they wanted to replace some of my content.
If you have questions or comments, please post in the comments below! If you want personal help or private training, please see this post. Good luck with your projects!
Latest Posts
- Uncomfortable Creatures
- From Convenience to Concern: How Data Mining Threatens Your Privacy
- Eye Tracking: A Peek Into Where You Look
- Tunnel Vision VR360 Test
- What Is Foveated Rendering?

Pingback: Making A Clickable Teleporter for SineSpace - trilo.org
Pingback: SineSpace Clothing Extra Pattern System Tutorial - trilo.org