

I am very excited to have finally gotten the chance to finish and release the Studio 1 Photographer’s Region Template. First and foremost, it is a region that I have wanted and needed to build for myself for a while. What’s more, I think this region is a great tool for creators and photographers alike. Click here to check out a tutorial on how to create regions and use a region template.
Super Easy To Swap
It doesn’t matter whether you only have the Free Region or you are on one of SineSpace’s premium subscription plans. It is super easy to swap the Studio 1 Photographer’s Studio region in and out as you need it. Check out my tutorial on how to create regions, once you have one set up you can easily swap it in and out.
When you disable a region (like your home or a photo studio), SineSpace takes it offline so people can not visit, but it saves all your preferences and furniture placement. When you need to use your Studio 1 region, just disable your active region, activate the studio, and then swap back when you’re finished.
Lightweight And Loaded With Features
The Studio 1 Photographer’s Region Template starts out as a very empty vessel, using less than 10MB of space. That will of course go up as you swap materials or add furniture and props (click here for a tutorial on moving and placing furniture), but this space is designed to be efficent!

The region is a large enclosed space. It’s 30 meters across by 10 meters high. There are seven point lights in the space, which you can control using the Edit Room controls as shown above. Click here for a tutorial on adjusting lighting.

Options Galore
When it comes to materials, you have options. Think of the photographer’s region template space as a large cylinder. You can change the base, the walls, and the ceiling materials, as shown above (check out a tutorial here). The floor you walk on is raised above the cylinder’s base. By default the floor material is clear, but you can change that to whatever you want (click here to check out my free InvisoClear material on the SineSpace web shop).
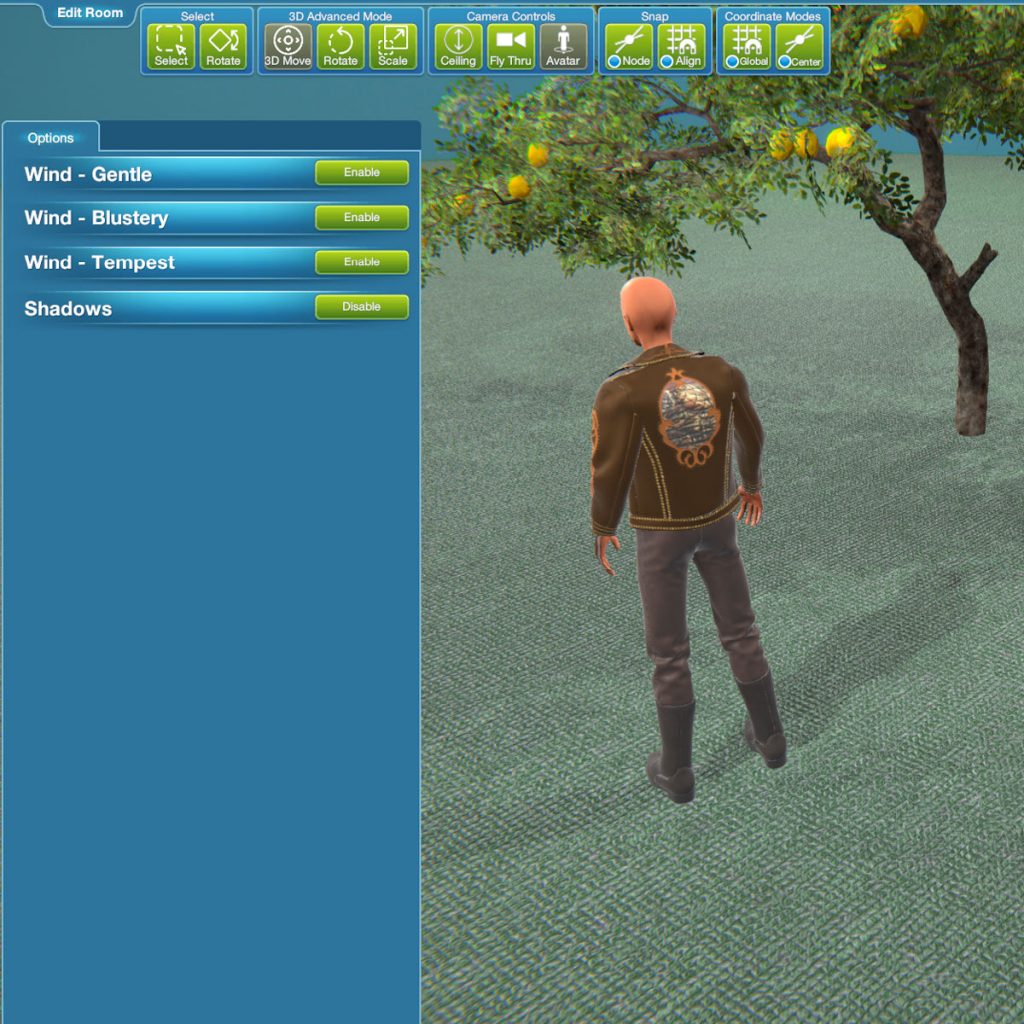
The Options button shows you… even more options.In the picture above, you can see Shadows. Clicking that button will turn them off – which can come in handy when you’re taking pictures for your SineSpace creations.

There are also some options for Wind. The picture above doesn’t show the motion, but you can choose between gentle, blustery, or tempest for wind settings – and of course leave them all disabled for no wind at all. If you’re working on trees or objects that makes use of the Unity Wind Zone component, this is a great space to test.
Take Better Pictures
The Studio 1 Photographer’s Region Template is the ideal stage for you to take better pictures. Whether you want your SineSpace products to shine or you just want to take better personal pics, this fits the bill. Since you can make the floor invisible it’s easy to get picture from a low angle.

The ability to swap the materials means you can switch from the default white background to colors for green screen (great for doing fancy overlays in other image editing programs). The base and ceiling have curved edges to minimize any hard edges (check out the green screen background below).

The Elephant In The Room
Your options are nearly limitless. Want a green screen wall with an elephant walking around on a pink shag rug? In SineSpace that’s totally possible! Additional materials sold separately, and I leave it to you to do your own elephant wrangling 😉

Easier Than Herding Cats
You really can use this studio to shoot nearly anything. As long as it will fit inside the space (10 meters high and 30 meters across), the Studio 1 photographer’s region template is perfect for your needs.

Studio 1 Photographer’s Pro Tip
If you’re a SineSpace creator looking for a place to take better pics of your products… look no further. There are two different ways to use the studio. The first is to test and submitting your item for review and getting it onto the live grid and SineSpace shop normally. Then using the Studio 1 Photographer’s Region to take additional (and better) pictures for an update. The other way is to test your item and get it right, but leave it set as Not For Sale so that when you submit it to the live grid, it will not appear in the SineSpace shop.

There is no wrong answer here, it is all about what you prefer to do as a creator. Some people prefer the ‘Not For Sale’ route so they can get their listing fine-tuned before a product launch. Others submit their items to the shop as soon as it’s ready, and take the incremental approach to filling in the blanks on their product listings. As long as you get a better product listing, you and your customers win.
It’s All About Me. And You.
I started out making this region for me. Soon it expanded in scope, I wanted something BlakOpal could also use when she wanted to take pictures in SineSpace. As things came together, I realized I could make this professional tool available to other SineSpace creators. Since you can customize it with different materials packs and furniture and props, what you get out of this will be unique to you.
Latest Posts
- Uncomfortable Creatures
- From Convenience to Concern: How Data Mining Threatens Your Privacy
- Eye Tracking: A Peek Into Where You Look
- Tunnel Vision VR360 Test
- What Is Foveated Rendering?

Pingback: How To Create Regions in the virtual world of SineSpace - trilo.org
Pingback: Rim Shader Avatar Skins in SineSpace by Trilo Byte Design